Do you want to create a contact info widget in WordPress but don’t know how? This article will help you create one for yourself.
Using WordPress can be a great way to showcase the information you want to show. Using contact information in WordPress widgets will help your users reach you easily.
What is a Widget in WordPress?
Widgets are a type of element or block in WordPress. These widgets are useful elements that can be used to create beautiful designs without having to code. Just choose the element, drag and drop and that’s it you are good to go. This is how simple creating a widget in WordPress is.
These elements/blocks can be used in different areas such as menus, sidebars, footer, or any place where a theme supports. However, footer columns and sidebars are the ideal areas to use widgets in my opinion. Your opinion may be different and that is completely fine.
What I’m trying to say is you can create a widget anywhere in the theme. As long as the theme supports it.
These blocks include menus, calendars, images, headings, archives, the latest posts, and much more.
Why it is Important to Have a Contact Info Widget in WordPress?
When you have a website it becomes vital to provide contact information. This will help you build a good link with your customers.
Another important thing is contact info should be easily accessible. So the user will not have to face any problems reaching you.
But how will you do this, this is where WordPress widgets come into play. These widgets will help you create beautiful contact info.
With that said let us dive know the process of creating a contact info widget.
How to Create a Contact Info Widget?
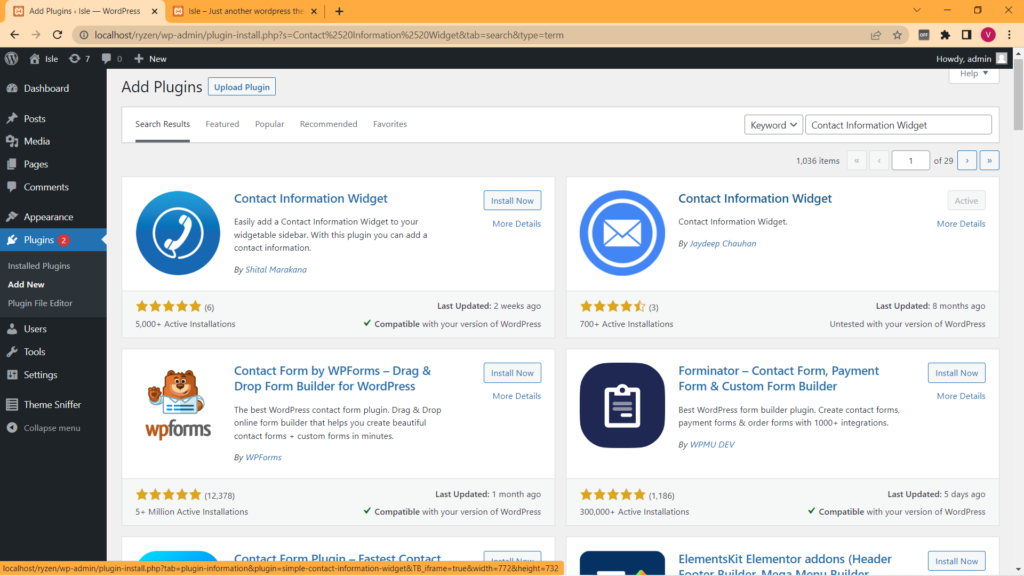
One of the easiest and most effective ways to create a contact widget info is by using a contact info widget plugin. You can choose the plugin of your choice as there are plenty of plugins available that will do the work for you. Choose the one which suits your needs and you will be able to create one for yourself.
1. Download and Activate the Plugin.
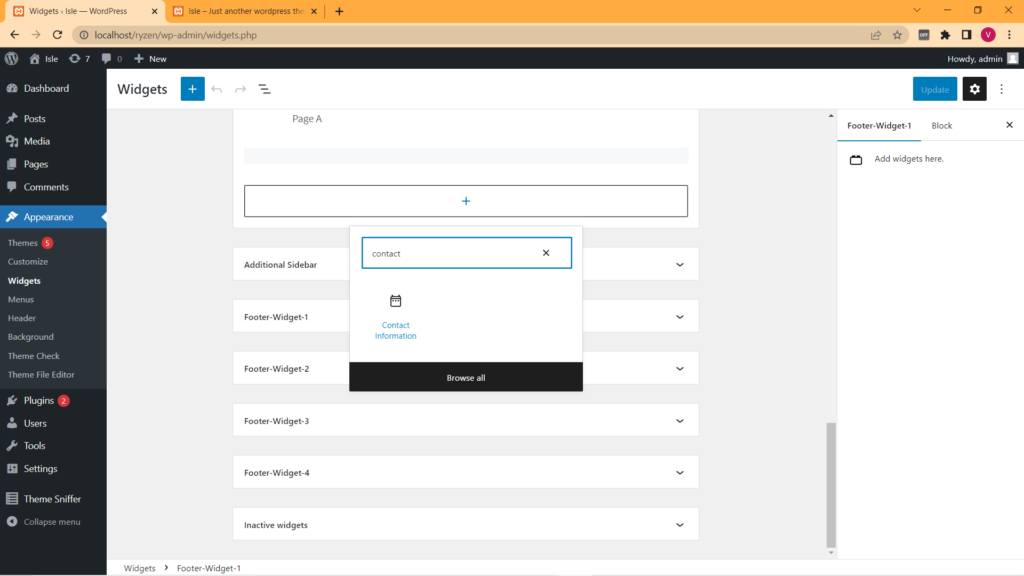
 2. Go to Appearance → Widgets → Choose the Contact Information
 From your WordPress dashboard go to appearance. Now can see the widget section click on it. This will take you to a window where you will be able to see all the available widgets. Now, choose the widget where you want to show the Contact information.
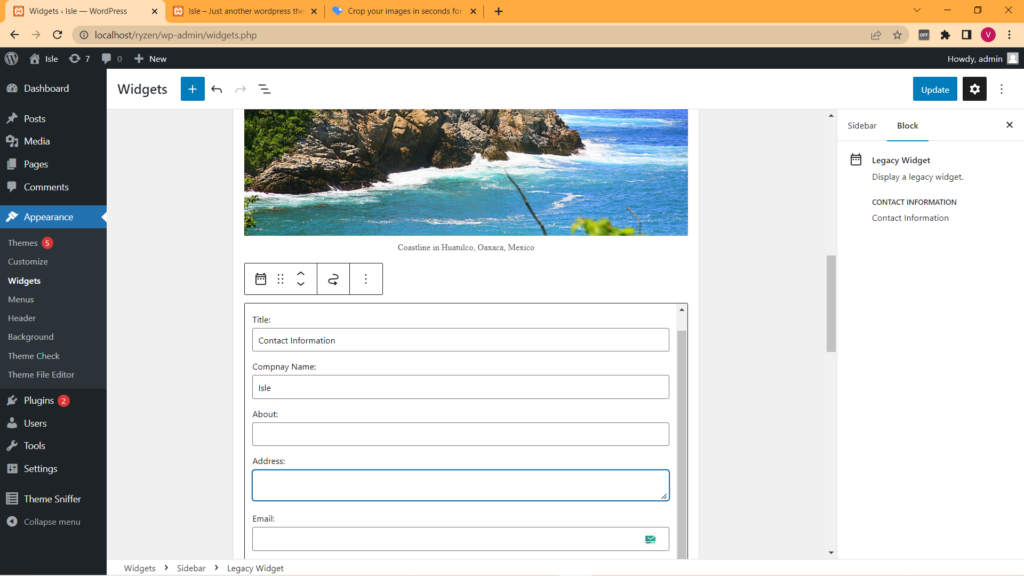
Here you will see a contact form where you have to fill in all the necessary information. For example Name, email, websites, mobile number, address, etc. You will also have the option to show or hide icons/labels.
3. Save the Changes.
After filling in all the information you want to show simply save the changes. That’s it, you have successfully created your contact form widget.

Now, go to your website and you will be able to see the contact information. However, the area where you will see the contact info vary theme to theme. But the process of creating the contact info widget will be the same.
Wrapping Up
In the end, I would say creating a contact information widget is a good way to build a link with your customers. Although, there is a problem and that is it will display on all the pages. I’m sure most of us will not like it.
If that’s the case with you, you better create a contact form on your contact us page. With that said, I hope you liked this guide on how you can create a contact info widget in WordPress. You may also want to see our guide on how you can compress images for better web performance.
Do you prefer creating a contact info widget or a separate contact us page? Tell us in the comments below.


