Have you ever heard of a child page in WordPress?
It is an excellent feature provided by WordPress. However, it is a less commonly used feature. It could be fruitful if you know how to use this feature.
Some pages on our site/blog are more important than others. So we don’t have to treat all of them the same way. Throughout the article, you will learn about a child page and how to create one.
What is Child Page in WordPress?
As you know, all your pages don’t have to be the same. You can create a proper hierarchy of pages according to their importance. As the name suggests, a child page is a subpart of another page. As a result, you can’t create a child page without a parent page.
Because they have much information to show, suppose you run a car repair business. Let’s say you have a website for it. You have a services page on your site where you show your services. The firms mainly use these types of pages.
Let’s say you have grown your business and want to show more information about your services. This services page will be your parent/main page. If you try to add all that extra information on the services page, it will not be the best way as the page length will oppose it.
Do you know how you can create it the right way? Let’s say you offer two types of services. The first one is on-site, where the customer has to come to the garage. This is where a child page comes into play. While in premium services, you provide walk-in services to your customer. The customer will need to reach out to you and book an appointment.
In this situation, you can create two sub-pages of services. The first page will be on-site services, and the second will be walk-in services. Creating a child page aims to elaborate on what the parent page offers. In a nutshell, a child page is the extension of a parent page.
How to Create a Child Page?
Creating a child is as simple as just creating a regular page. Here I will show you how you create a child page in a few clicks.
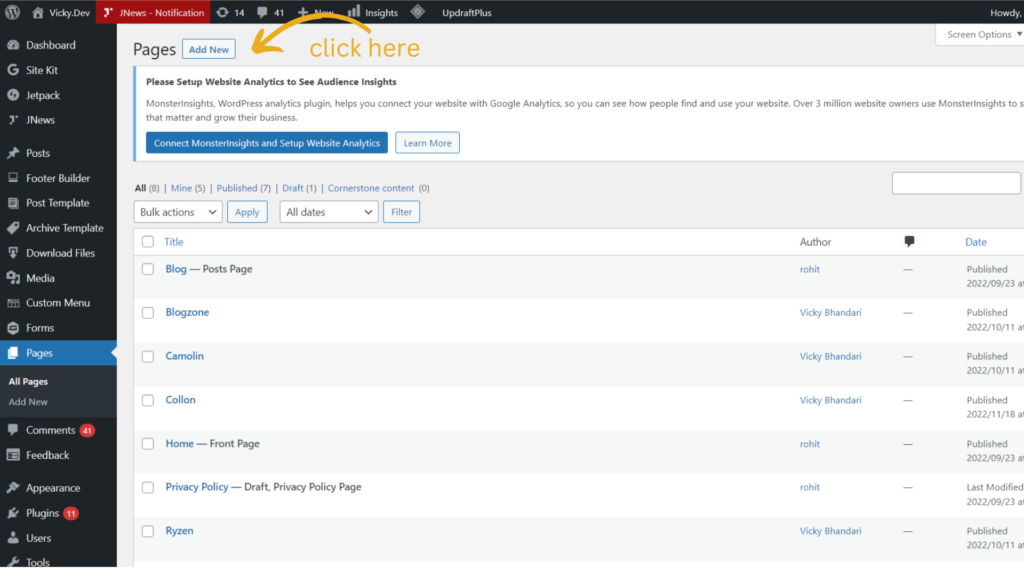
Step 1- Create A Sub Page
To create a sub-page, go to pages from your WordPress admin panel. From here, click add new. This will create a new page.
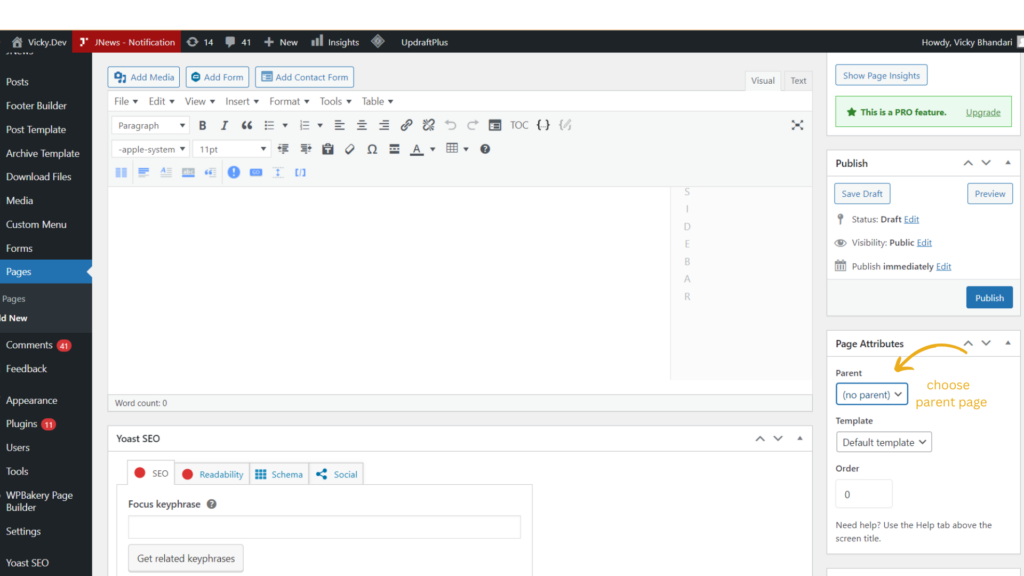
Step 2- Select Parent Page
Now select your parent page from the page attributes on the right. In case you don’t find it check the screen options. In most themes, you will find this option in the same place.
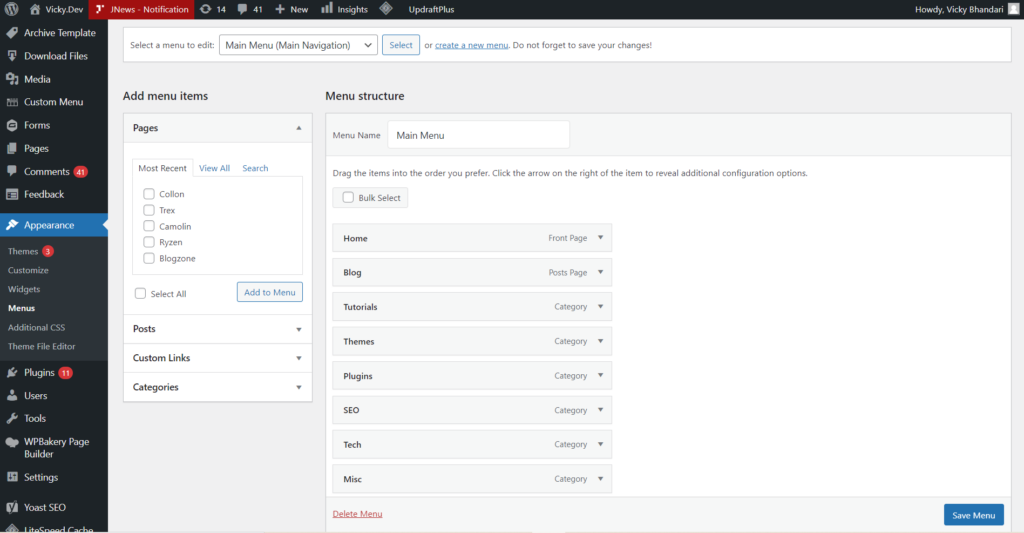
Step 3- Set Child Pages in the Menus
Now you have created your child page successfully. Set them appropriately in the menus. That’s it. Now you will be able to organize your site better.
 Child Page vs. Parent Page the Difference
A parent page is superior to a child page. How? Because it’s not possible to create a child page without a parent page. At the same time, a parent page is fully independent. It leaves its mark on a sub-page, whereas a sub-page doesn’t. You can create a fully functional website without using a child page. On the other hand, you can’t make a website without using a parent page.
Benefits of a Child Page in WordPress?
Although the benefits of creating a child when are many. Here I will show the most important ones.
1. Makes the User Experience Better
Everybody loves a good user experience. A well-organized site makes the site much better when a user finds everything the information quickly. Chances of him staying at the site increase. In addition to this, a well-organized site leads to better sales.
2. Good for Search Engine Ranking
Make sure to distinguish the child page from just navigation. It is much more important than that. When the site is well structured, it gets easy for search engines to find the information. For instance, if a visitor comes to your site and finds it difficult to get the desired information, he will go away. Let’s be honest nobody wants that. That’s why it gets essential to structure a website properly. A child page is one of the main features, and you can achieve this.
As a result, the search engine leads will be far more relevant. When searches are more appropriate, the chances of your blog growing increase drastically.
Final Thoughts
Finally, we have come to the end of this article. We tried to make you understand everything about a sub-page. Now it is up to you how you want to use it. We can’t control the user’s behavior, but we can improve our site’s user experience. So please follow the guidelines we gave you and organize your site better. You might also like our guide on boosting your WooCommerce speed.


