Images are a crucial part of a web/blog. But the problem is that having too many unoptimized images makes the site loads slower. As a result, users go away. Moreover, it gets difficult for the site to rank higher on search engines. You don’t want that, right? I’ll explain to you the most straightforward way of optimizing images.
Why is image optimization important?
In layman’s language, image optimization is changing the images into smaller sizes. The critical point here is to reduce file size without losing the quality. Images contain much information that we can’t see. Even if we reduce that information, the image quality will be preserved. For this reason, we optimize images to load faster and occupy less space. Now you know the importance of image optimization; you can also check the best ways to optimize images for web performance.
Best Way to Optimize the Images
Resize images
The first step towards image optimization is always compression. However, for the best results, more is needed. You need to resize images to the desired size. Let’s say you have a high-quality image of 4000X 3000px size. Even though the image looks great, it has no practical use. So it’s better to resize them. Another way is to convert them to WebP, which we will discuss later.
Steps to Use Imagify
The installation and usage of the Imagify plugin is straightforward. All the features are easily accessible. With a couple of clicks, you can optimize your images and get better performance.
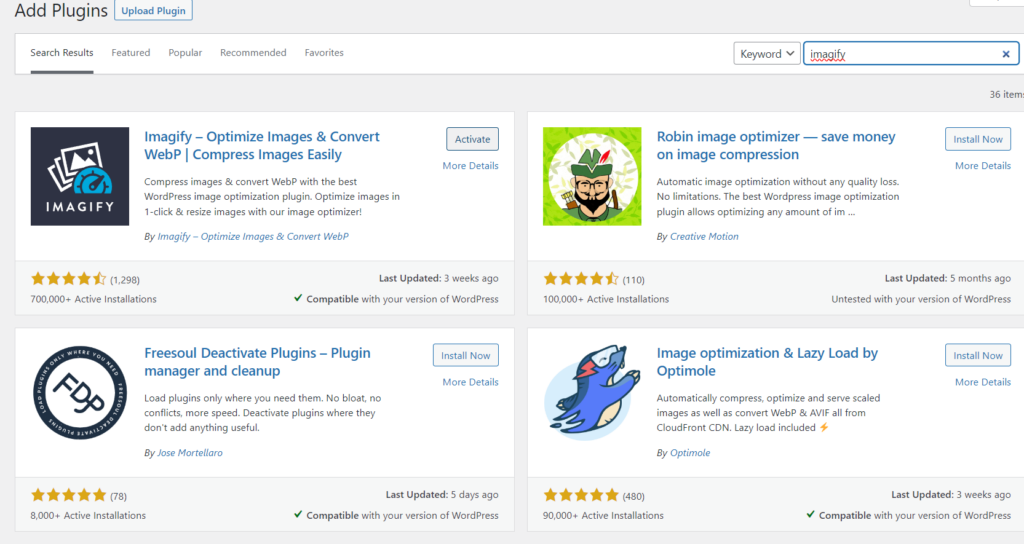
Download and Install the Imagify Plugin.
You can download it from the official site or your WordPress dashboard. Both ways will work for you. I recommend downloading it from the dashboard plugin section if you are a beginner. Once the downloading process is completed, please activate it.
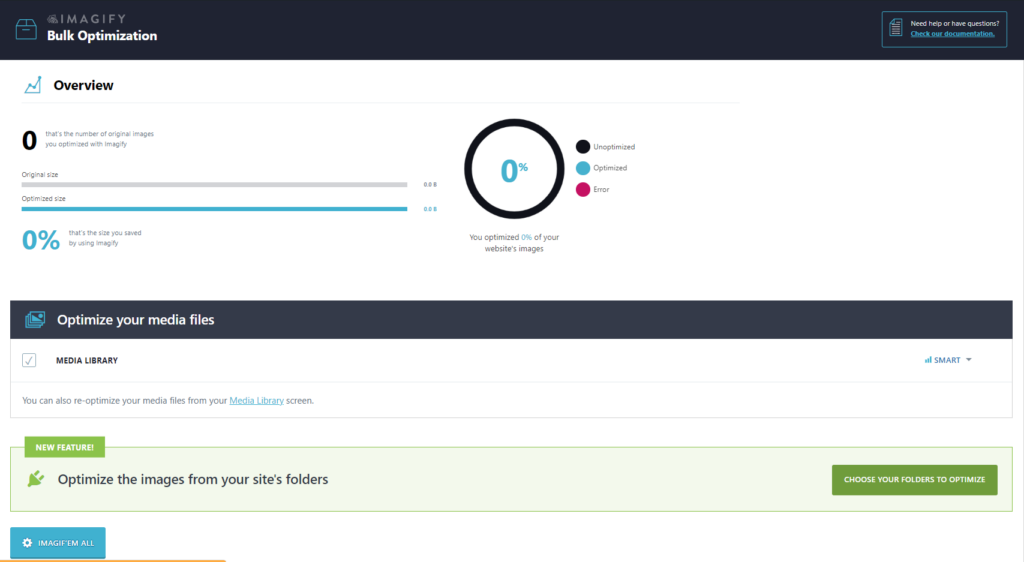
 Select the Folder/Images
Now you’ll need to select the images you’d like to optimize. Go to the media section from your WordPress Dashboard to choose pictures. Here you will see multiple options. One such option is bulk optimization. It can come in handy if you want to optimize all your images at once. However, you have the option to optimize them one by one.
 Recommended Settings
The Imagify plugin offers multiple settings and features to simplify things. There are some features available. If you use them, the optimization will become super simple for you.
Auto-Optimize Images on Upload
For most people, it is the most convenient feature. If you enable it, it will optimize all your images whenever you upload any image. On the other hand, if you want to optimize images individually, you can do that too.
Backup Original Images with Imagify
Before you start the optimization process, I strongly suggest you back up your original sizes. Here are the reasons.
- To generate WebP versions.
- To change the image resolution.
- To restore it to normal.
Create and Use the Webp Version.
Webp is the latest image compression technology. It reduces images too much smaller sizes. The good thing is it does the optimization without losing the quality. If you enable that option, you will end up with both jpg/png and Webp versions of images. This way, even if some browser doesn’t support these WebP images, they can show the JPG/PNG versions.


